
Introduction
When it comes to building a blog/portfolio site, beginners are often directed to services like WordPress or Squarespace. This is understandable, as these website builders provide a tightly guided creation process. Past this beginner plateau however, the difficulty in creating and hosting a fully customizable site increases dramatically. Some services can alleviate this, but often for a price.
After reading this thread on reddit I realized that even for people with web development experience, the lack of easily available instructions have many defaulting back to this beginner step as well. If you think more advanced web-content creation involves diving into code or crafting HTML for every post, then website builders with built in editors would undoubtedly seem very appealing. However, I am here to tell you that this is not the case and that similar tools and easy to use workflows are available for custom built sites as well.
This guide aims to create a guided “mid-tier” plateau that those beginning their web development journey can reference to help them move beyond standard website builders. We will build a site with Hugo, apply a site theme, use Forestry.io for our CMS, and host with GitHub Pages.
Why this stack?
1. Free
- From beginning to end, this entire process is free. This blog you are looking at right now was created with this stack for free and does not cost anything to host.
- GitHub Pages is already set up to easily support paid custom domains if you want a different URL for your blog.
2. Easy content creation with a CMS
- Making content is just as easy as website builders. You get a fully functional online text/markdown editor that automatically commits to your sites repository.
- No need to open code or edit HTML just to make a new post.
- Here is an example of me making a new post for my blog on Forestry:

3. Easy to use/workflow
- Create content on Forestry (this commits to your repository)
- Run a script that does the following
- Pull update from repository into your build directory
- Build site using Hugo
- Add, commit, and push changes to your repository
- GitHub Pages detects that you made changes and automatically updates your site within minutes.
- After creating the content, it takes me less than 30 seconds to update my site with the new post.
4. Easy to set-up
- Hugo and Hugo Themes do all of the heavy lifting for generating your website.
- No need to build all the logic and HTML for tags. categories, search functionality, syntax highlighting, etc. Generating a site and getting it online can be done in less than an hour.
5. Customization
- Since everything is HTML and JavaScript, changing the site layout and little details is completely under your control. No more default footers advertising WordPress or Squarespace on your site.
- Toggle or button not where you want it? Moving elements around and custom CSS is easily done in the Hugo framework.
6. Git and GitHub Integration
- At the end of this you will have a site with a commit history for both posts and site edits. This is built into the build and deploy scripts so it’s very integrated.
- Somehow broke your site? Just git checkout back to a working commit.
Assumptions
- This guide is written for Windows 10, but very applicable to Linux/Mac.
- Git and Git Bash are installed. This is how I use Git and run bash scripts on Windows 10.
- Visual Studio Code was used to edit and create all of the files necessary.
- For customizing: you have some understanding of how HTML/CSS/Javascript work. You can manipulate the DOM and find out classes/selectors for elements from the console.
Let’s begin!
GitHub Setup
Before we get started, make sure you have a GitHub account. It’s free, easy to set up, and incredibly useful.
- The first step is to create two repositories in GitHub. One for the files you use to generate your website and the other for serving your static website files. Make sure both are public and empty.
- Repo #1:
<your-website-build>- The above repository will be used for your website’s build. I recommend something like
blog-build,blog-source,portfolio-build, etc.
- The above repository will be used for your website’s build. I recommend something like
- Repo #2:
<your-website>-
The above repository will be used to serve your generated web files to the internet. I recommend something like
blog,portfolio, or<username>.github.io(special repository name).Note: If you set Repo #2 to
blogyour website URL will be<username>.github.io/blog/, if instead you want<username>.github.ioto direct to your site, then use that as the name.E.g. your username is coolperson, set Repo #2 to
coolperson.github.io.
-
- Repo #1:
- Throughout this guide I will refer to Repo #1 as the build repository/folder/directory and Repo #2 as the site repository/folder/directory.
Hugo Setup
This will setup Hugo on your system so that you can use it as a command from Git Bash/Terminals. Hugo is a framework for building websites that automates much of the process while still allowing for very deep customization. Commands like hugo server will run a local live-server for easy website previewing/tweaking and hugo will generate the static files you will serve as your website.
The following instructions are specific for Windows 10. Mac and Linux users can find installation instructions here.
Setup
- Create a new folder
C:\Hugo. - Create a sub-folder in the Hugo folder
C:\Hugo\bin. - Download the latest zipped Hugo executable for your system from Hugo Releases.
- For me this was
hugo_0.91.2_Windows-64bit.zip.
- For me this was
- Extract all contents to your
C:\Hugo\binfolder.-
Your directory should look like the following:
 C:
 └───Hugo
     └───bin
         ├───hugo.exe
         ├───LICENSE
         └───README.md
-
- Add the
C:\Hugo\binfolder to Windows PATH settings.- Hit the
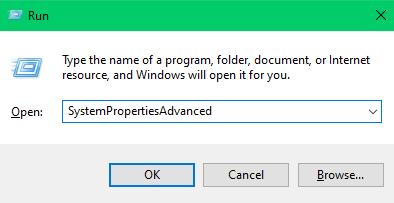
Windows + Rkey combination or from the start menu typerunand hitenter. - In the run application, type
SystemPropertiesAdvancedand hitenter.
- Click on
Environment Variables...on the bottom right.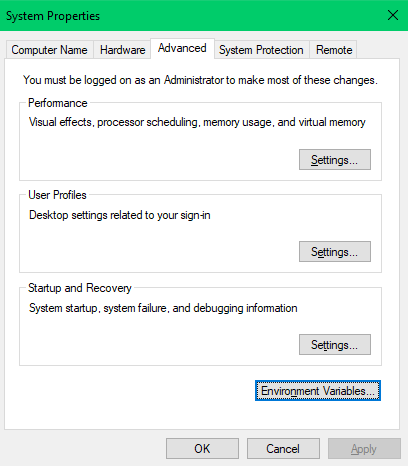
- Under
User variablesdouble click onPATH(might bePath).- If you are an admin and the only user of your computer feel free to add to the
PATHunderSystem variables.
- If you are an admin and the only user of your computer feel free to add to the
- Click on
New. - Type
C:\Hugo\binhitenterand then clickOK. - Click
OKon the Environment Variables window, and thenOKon the System Properties window.
- Hit the
Verify
At this point we need to run a few commands to verify that the executable is ready to use. To ensure that the PATH environment variables have propagated, it’s best to restart your computer. At the very least, make sure Git Bash and any Terminal apps are fully closed.
-
Open Git Bash.
-
Type
hugo helpand hit enter. -
You should see output that starts with:
hugo is the main command, used to build your Hugo site. Hugo is a Fast and Flexible Static Site Generator built with love by spf13 and friends in Go. Complete documentation is available at https://gohugo.io/. -
If you see that, success! You have correctly installed Hugo.
-
If the installation was not successful, please consult the official Hugo instructions for installing on Windows here.
Build & Theme Site
Now for the meat and potatoes. We will build the site with Hugo, attach our theme of choice, rig it all up to GitHub, and deploy to GitHub Pages. Let’s go!
Create the GitHub build directory.
-
On your build repository on GitHub (Repo#1), copy the HTTPS link. It should look something like
https://github.com/<username>/blog-build.git. -
Git Bash into the folder where you want to keep your build directory.
cd documents/github- Pay special attention to the slashes! Windows file paths with
\will not work in Unix based utilities. - Alternatively, you can
right clickin the folder you want and selectGit Bash herefrom the context menu.
- Pay special attention to the slashes! Windows file paths with
-
Clone your build repository:
git clone https://github.com/<username>/blog-build.git -
A new empty folder with your repository name should now exist in the directory. E.g.
documents\github\blog-build.
Build the site with Hugo and attach a theme.
-
In the Git Bash terminal, build your Hugo site into the newly created directory with the following:
hugo new site <folder-name> -f yml --force- E.g.
hugo new site blog-build -f yml --force. - You should see a message in the terminal congratulating you.
Note: feel free to omit
-f ymlif you want to use the defaulttomlfiles for your configurations. I am more familiar withyaml/ymlfiles and find them easier to read but they are both quite similar. - E.g.
-
Next is theming, our theme in this example will be PaperMod. Feel free to browse the many themes at https://themes.gohugo.io/ for other options.
-
In the terminal, go into the build directory.
cd <folder-name>- E.g.
cd blog-build
- E.g.
-
Now that we’re inside our build folder, run:
git clone https://github.com/adityatelange/hugo-PaperMod themes/PaperMod --depth=1Note: to update the theme, go into the PaperMod theme folder and git pull.
E.g.
cd themes/PaperModfollowed bygit pull.The next couple steps are optional but will better flesh out your site on the first build and help you understand what’s going on. I highly recommend you do them.
-
Optional: Populate your config file.
- Go to: config.yml
- Download and replace your
config.ymlfile with the file above or open yourconfig.ymlfile and replace the contents. - Your config file should be in the root of your build folder.
Important: on line 1 of
config.yml, changebaseURL: "https://examplesite.com/"from the example site to the link that your own site will occupy. An example:1baseURL: "https://cambuchi.github.io/blog"If you do not do this, then when you turn on GitHub Pages your site will not render correctly.
-
Optional: Create a skeleton post.
- Go to: helloworld.md
- Download the
helloworld.mdfile and place it intocontent\posts\in the root of your build folder. E.g.blog-build\content\posts\helloworld.md.
-
Let’s leverage one of Hugo’s tools and preview our site on a local live server! With terminal pointed at your build’s root directory, run:
hugo server -
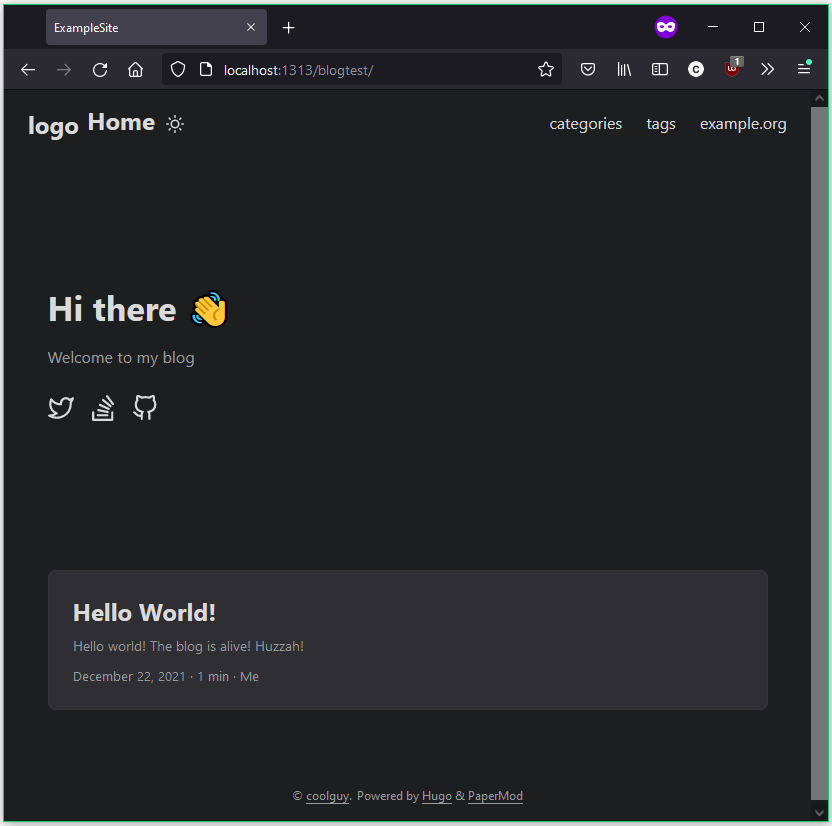
You should see a message in the terminal with a line that says
Web Server is available at http://localhost:1313/blog/ (bind address 127.0.0.1) -
Visit the local host link (in the above case
http://localhost:1313/blog/) in your web browser and you should see a live preview of how your site currently looks! Ain’t she a beauty?
Link Site Repo as a Submodule
Next we will link our site repository (Repo #2) so that when the site gets built, GitHub pages detects the update and immediately publishes our changes to our domain.
-
First we need to remove the
publicdirectory from the build repository. This is so that we can use it as a submodule for our site repository. Inside the build root directory:rm -rf public -
On your site repository on GitHub, copy the HTTPS link. It should look something like
https://github.com/<username>/blog.git. With that we can add our site directory as a submodule:git submodule add -b main <HTTPS-repository-link> publicAs an actual example:
git submodule add -b main https://github.com/coolperson/blog.git publicNote: depending on your Git/GitHub settings,
mainmight have to be replaced withmaster. You can easily determine which to use with Git Bash. When pointed at a root folder, there will be parentheses after the file path telling you which branch you are on.
As you can see from my example above in the blue text. My branch is
main. -
Great! Now when we run
hugoour site will be generated intopublic, and sincepublicis a submodule with an origin at our site repository, whenpublicgets pushed it heads into GitHub, automatically triggering GitHub Pages to update our website.
Let’s populate our GitHub’s build repository so that we have a branch for our CMS to hook onto and our site repository so that there is a commit for git to main branch. This first commit will be the only time that we do this manually. Enter the following while the Terminal is pointed at the build’s root folder.
    hugo
    git add .
    git commit -m "First commit"
    git push origin main
Now bash into the public folder and run those same commands.
    cd public
    git add .
    git commit -m "First commit"
    git push origin main
Forestry.io Setup (CMS)
Now that our site is built and rigged up to GitHub, let’s add in a CMS so that content creation is as simple as possible. Before we get started head on over to Forestry.io and create your account. It’s free for personal use and allows you to add up to 3 users per website.
-
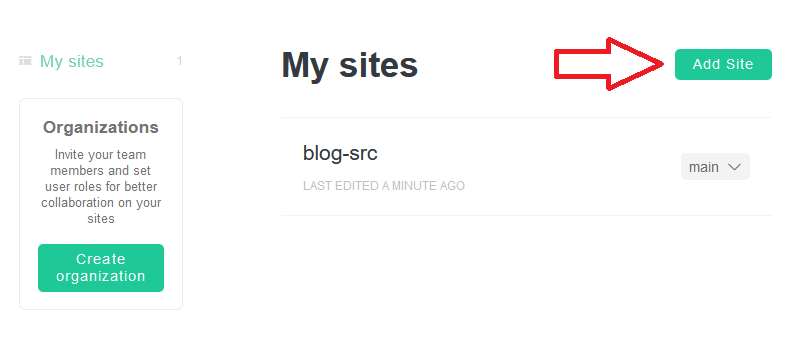
In the top right-hand corner of the page, click
Add Site. -
Then select
Hugoas your static site generator. -
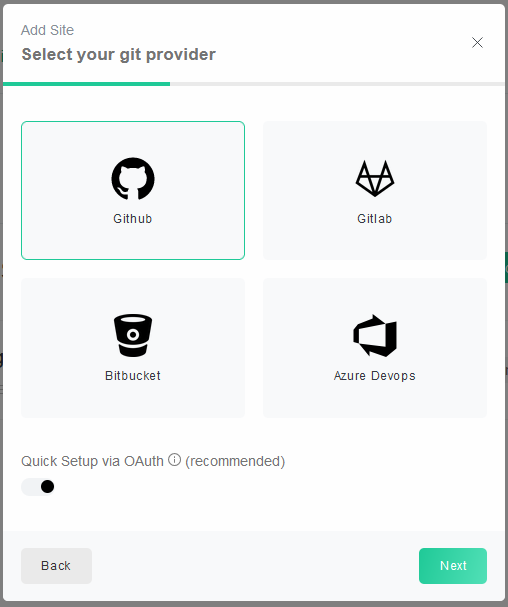
Choose GitHub as the Git provider.
-
A browser window (not pictured) should then pop up asking for your credentials in order to authenticate.
-
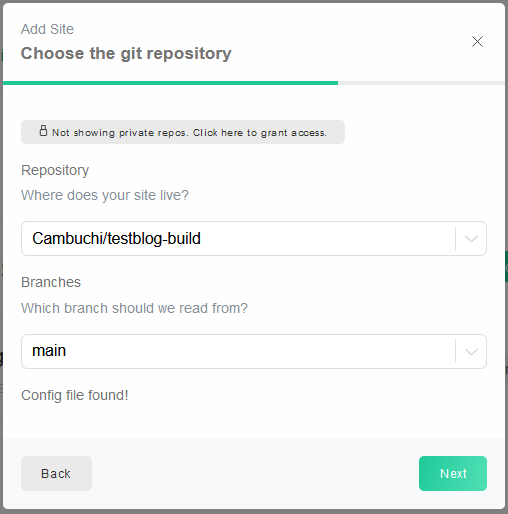
After authentication simply select the your build repository (Repo #1), not your site repository. Pick the
mainbranch of your repository.Forestry should detect your config file and display
Config file found!. If not, then make sure Hugo is properly set up.

That’s it! Forestry is now set up as a CMS for your site. We will go over the workflow and how to use Forestry in more detail at the end.
Automating
Since changing directories, pulling, adding, committing, and pushing all the time is tedious, we will also write a few bash scripts to automate updating our build and deploying our site.
Note: All scripts will be created and saved onto the build’s root directory.
- First we will create a helper function to change directories since terminal cannot execute
cdwhen called from a script. See here for more details.-
path.sh
1
2
3
4
5
6
# Filename: path.sh # This file should be sourced function public() { cd "public" }
-
- Next we will create a script that updates our build.
-
update.sh
 1
 2
 3
 4
 5
 6
 7
 8
 9
10
11
12
13
14
15
16
17
18
19
20
21
22
23
#!/bin/sh # If any part of the script fails the deploy stops. set -e # Status message printf "\033[0;32mUpdating build to GitHub…\033[0m\n" # Update with any commits the CMS might have added. git pull # Build the project. hugo # Add changes to git. git add . # Commit changes. current="`date +'%Y-%m-%d %H:%M:%S'`" msg="Updated build: $current" git commit -m "$msg" # Push source. git push origin main
-
- Lastly we will create a script that builds our static files and deploys our site.
-
deploy.sh
 1
 2
 3
 4
 5
 6
 7
 8
 9
10
11
12
13
14
15
16
17
18
19
20
21
22
23
#!/bin/sh # Source the public directory to cd into. source ./path.sh # If any part of the script fails the deploy stops. set -e # Status message. printf "\033[0;32mDeploying updates to GitHub…\033[0m\n" # Go to public folder. public # Add changes to git. git add . # Commit changes. current="`date +'%Y-%m-%d %H:%M:%S'`" msg="Deployed site: $current" git commit -m "$msg" # Push source and deploy. git push origin main
-
To use a script it’s as easy as opening Git Bash in the build’s root directory and typing ./update.sh. Let’s run both scripts right now since we have completed setting up our site’s tech stack.
|
|
|
|
Activate GitHub Pages
With our site set up and ready to go, let’s turn on GitHub Pages for our site repository and get our content on the internet.
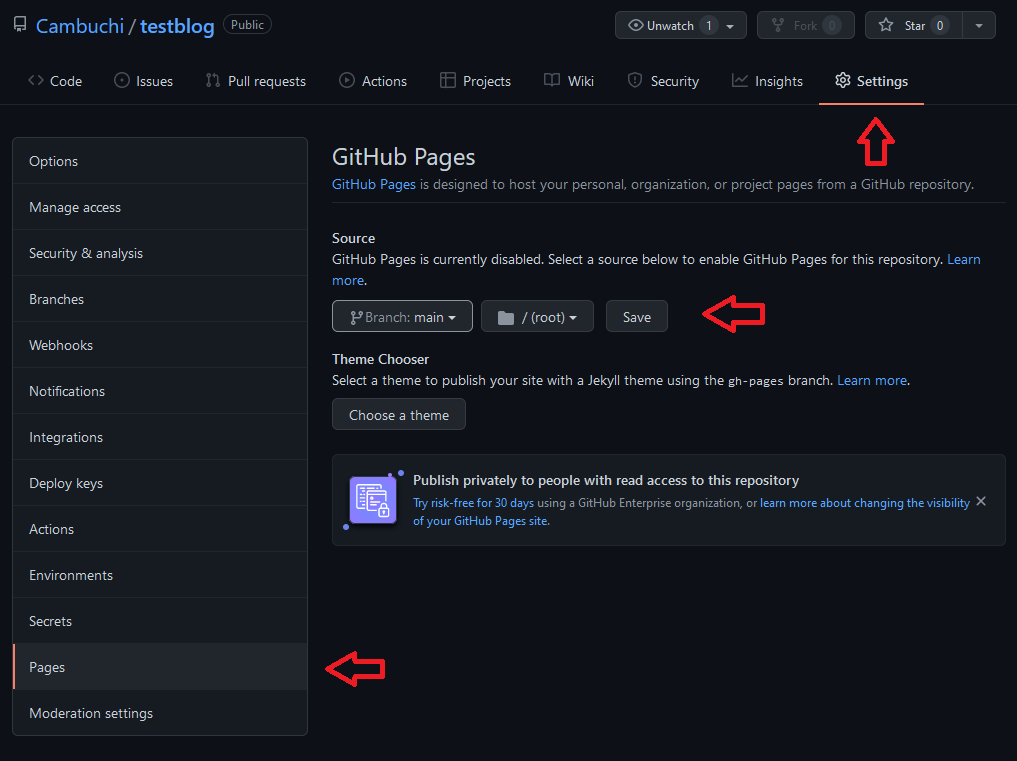
- On GitHub, go to your site repository.
- Click on
Settings, thenPages - Select the
mainbranch in the root directory and click save. - You will need to wait about a minute or so for GitHub Pages to build your site. When your site is ready, this settings page will display a green confirmation box saying that your site is published.
Workflow
With our site published online, let’s go through the work flow process. The first time we do this there is some setup involved because markdown files require a “front matter template” to let the site generator know what type of document and configuration is being made.
Initial template creation
- Navigate to your dashboard on Forestry.io.
- Click on your site’s repository.
- Click on
Postson the left. - Click
Create Newat the top.- Since we do not have any post templates, the first time you create a new post you will need to make one.
- Create a new template based on existing documents.
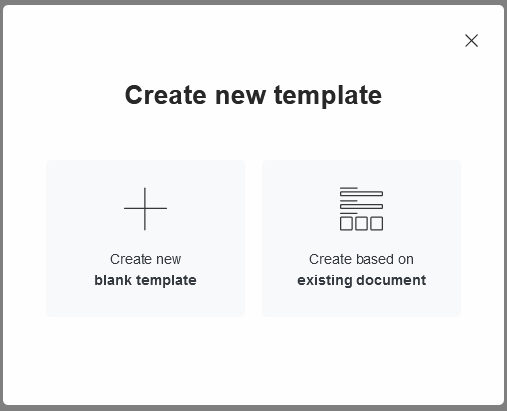
- Use the
Hello World!as the template and label it something like “Blog post”. 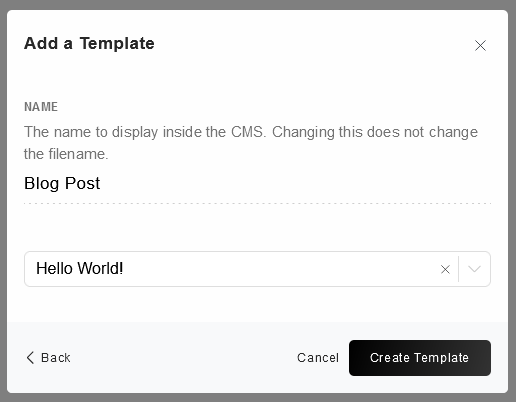
Regular workflow
- Create a new post on Forestry.
- Click Save on the top right when you are done. This commits your post markdown file into your GitHub repository.
- Git Bash into your build directory on your machine.
- Run
update.shand thendeploy.sh
|
|
|
|
That’s it! Your web site should update with the new content in less than a minute.
Here’s a demo of me creating a post, updating the site, and seeing the changes live online in less than a minute.
Conclusion
With this tech stack, having complete control over your site while not compromising the content creation flow is easily achievable. Imagine handing over a mature site to a content creator or team of writers who don’t need to understand any development to create content for the site.
Now when it comes to customizing your site, I find the best way is to start a local live server with hugo server and to fiddle around with your configuration files and layouts. If necessary, do not be afraid to look at the Hugo documentation. Your Hugo theme’s GitHub repository might have some tips as well. If you are familiar with web development this should not be a huge hurdle.
Join me next time where I will dive into how to move elements around, add elements, add pages, set custom CSS, in other words: how to customize your Hugo site. Thanks for reading!